

When embarking on a vintage restoration project, achieving the perfect paint color match is crucial to preserving the integrity and charm of the original piece. Whether you’re refinishing antique furniture or enhancing the aesthetic appeal of a classic automobile, a successful color match can significantly impact the overall finish and authenticity of your work. This article provides practical tips to help you navigate the intricacies of paint color matching, ensuring your project stands the test of time.
Understanding the nuances of color theory is paramount in any restoration endeavor. Subtle variations in hue, saturation, and brightness can make a world of difference when trying to replicate a specific color. It’s essential to consider not only the visible color but also the material underneath; wear and age can alter the original tone, complicating the matching process. By employing the right techniques and tools, you can achieve an accurate and pleasing finish that respects the vintage spirit of your item.
In this guide, we will explore various methods for identifying and matching paint colors, including utilizing color samples, employing technology, and understanding the role of lighting in your matching efforts. With these practical tips, you’ll be better equipped to tackle your restoration projects with confidence and achieve a beautiful, cohesive finish that honors the past while standing proudly in the present.
Understanding Color Theory for Paint Matching
Color theory plays a crucial role in achieving accurate paint matching, especially in projects involving vintage restoration. By understanding the fundamental concepts of color, you can enhance your ability to select the perfect shade for your needs.
Primary Colors are the foundation of all other colors. In the context of paint, these are red, blue, and yellow. By mixing primary colors, you can create a wide range of hues. For vintage projects, being mindful of the original colors used can guide you toward creating an authentic finish.
Complementary Colors are opposite each other on the color wheel. These combinations can create a striking contrast that can be particularly effective in restoration projects. Knowing how complementary colors interact can help balance your palette, especially if you are working to match or enhance existing colors in vintage décor.
Analogous Colors lie next to each other on the color wheel. These shades typically match well and create serene and comfortable designs. When restoring a vintage piece, selecting analogous colors can help maintain the original aesthetic while providing a fresh look.
Value, or the lightness and darkness of a color, is another important aspect to consider. The right value can make a significant difference in achieving a cohesive appearance. Ensure that the paint used in restoration reflects the value of the original color, preserving the intended depth and richness.
Saturation, which refers to the intensity of a color, is essential for matching paint accurately. Highly saturated colors can stand out and evoke strong feelings, while desaturated colors tend to give a more muted, vintage appearance. When working on restorations, it’s crucial to choose a saturation level that aligns with the original finishes used in the piece.
Lastly, lighting can dramatically affect how paint colors are perceived. Natural light can reveal the true color, while artificial lighting can cast different hues. Testing your paint samples in various lighting conditions can help ensure that the final match is accurate and true to the vintage style you are aiming to achieve. Understanding these color theory principles will enhance your ability to select and match paint for successful restoration projects.
Methods for Achieving a Vintage Finish
Achieving a vintage finish can transform a piece of furniture or decor, giving it character and charm. To successfully replicate this look, several methods can be employed.
1. Distressing Techniques: Start with sanding down the furniture to create a worn look. Use a fine-grit sandpaper on edges and raised areas where natural wear would occur. You can also apply a hammer or other tools to dent the surface slightly, enhancing the aged appearance.
2. Layering Paint: Use multiple layers of paint, starting with a base color and allowing it to dry completely. Follow with a second, contrasting color. Once dried, gently sand or use a wet cloth to remove some of the top layer, revealing the base color underneath. This technique mimics the natural wear of antique pieces.
3. Glazing: After applying the primary color, consider using a glaze to enhance the depth of the finish. A tinted glaze provides a translucent layer, allowing the base color to show through while also settling into crevices, creating an aged effect.
4. Wax Finishes: Once the paint is fully dried, applying a wax finish can add richness and achieve a soft sheen. Choose a clear or tinted wax based on your desired effect. The wax not only protects the paint but also enhances the vintage allure.
5. Using Chalk Paint: Chalk paint is famous for its matte finish and ease of use. It adheres well to various surfaces and typically requires minimal prep work, making it ideal for vintage finishes. After painting, distress as desired to achieve the perfect aged look.
6. Staining: If you prefer the natural wood look, consider using a wood stain instead of paint. Select a stain that mimics the tones found in vintage wood furniture, then apply a clear topcoat to seal the finish.
Implementing these methods will help you achieve a timeless vintage finish, enhancing the overall appeal of your painted items.
Steps for Restoring Paint on Antique Furniture
Restoring the paint on antique furniture requires careful attention to detail to preserve its vintage charm while achieving a fresh finish. Follow these steps to ensure a successful restoration process.
-
Assess the Condition:
Evaluate the furniture piece for its overall condition. Look for existing damage, peeling paint, or areas where the finish is worn.
-
Choose the Right Environment:
Work in a well-ventilated area to minimize exposure to fumes from paint and solvents. Good lighting will help you see the details clearly.
-
Gather Necessary Supplies:
- Drop cloths
- Paint stripper or solvent
- Sandpaper or sanding block
- Primer suitable for antique woods
- High-quality paint for the finish
- Paintbrushes and/or rollers
- Clear topcoat for protection
-
Remove Old Paint:
Apply a paint stripper to the surface using a brush. Allow it to sit according to the product instructions, then carefully scrape off the old paint. Always wear protective gloves and goggles.
-
Sanding:
Once the old paint is removed, sand the surface to create a smooth base for the new finish. Start with coarse sandpaper and gradually move to finer grit for a polished look.
-
Clean the Surface:
Wipe down the entire piece with a damp cloth to remove dust and debris from sanding. Allow it to dry thoroughly before proceeding.
-
Apply Primer:
Using a brush or roller, apply a primer to promote adhesion of the new paint. Choose a primer compatible with both wood and the paint type you’ll be using.
-
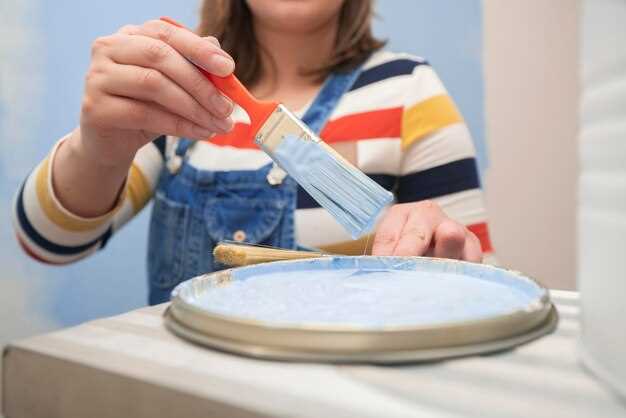
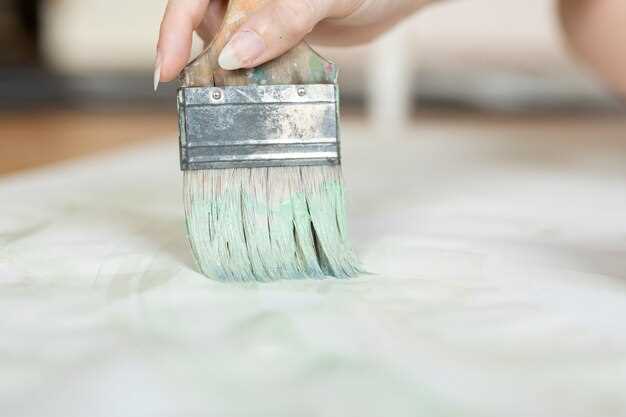
Paint Application:
After the primer has dried, apply the paint in thin, even coats using a brush or roller. Allow each coat to dry completely before adding another layer. This ensures a smooth, vibrant finish.
-
Topcoat for Protection:
Once the paint is completely dry, apply a clear topcoat to protect the finish. This step is essential for enhancing durability and maintaining the beauty of the antique piece.
-
Final Touches:
Inspect the finished piece for any imperfections. Touch up any areas as needed and let it cure for the recommended time before use.
Following these steps will help you restore the paint on your antique furniture, ensuring that its vintage appeal is not only preserved but also enhanced with a new finish.


