

In the realm of automotive restoration, achieving a period-correct paint finish is not just about aesthetics; it’s about honoring the history and craftsmanship of the era. Detailing a vehicle to match its original paint scheme requires an understanding of the materials and techniques used during its production. From the choice of paint to the application methods, every detail plays a crucial role in replicating the look and feel of vintage automobiles.
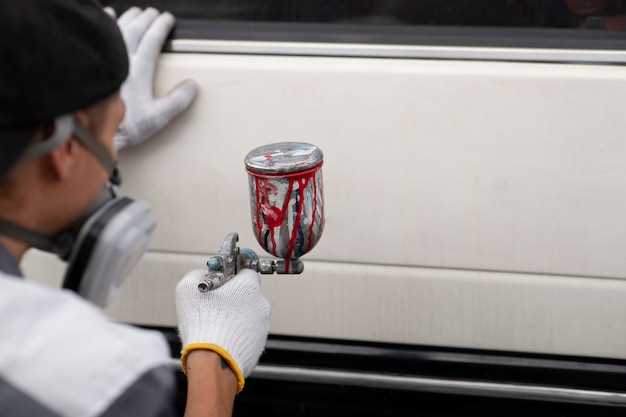
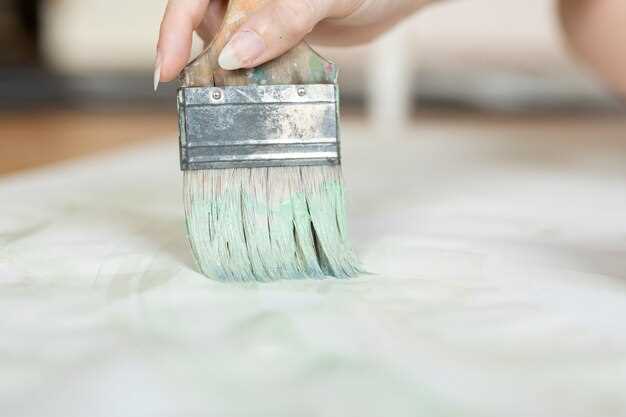
To successfully navigate this intricate process, restorers must familiarize themselves with the specific characteristics of period-correct paints. This includes understanding the differences between lacquer, enamel, and other paints commonly used in the past. Each type of paint offers unique properties, such as drying times and durability, which can significantly impact the final finish. Moreover, the techniques employed during the application, such as spraying, brushing, or even hand-rubbing, are essential for replicating the original appearance.
Additionally, achieving a flawless finish often involves meticulous preparation and attention to detail. Surface preparation, from sanding and priming to selecting the right tools, sets the foundation for a successful paint job. Restorers must also consider the effects of aging and weathering when creating a finish that not only looks authentic but also stands the test of time. By combining historical knowledge with modern techniques, enthusiasts can breathe new life into classic vehicles while preserving their legacy.
Choosing the Right Paint for Historical Accuracy
Selecting the appropriate paint for a period-correct finish is essential for achieving historical accuracy in restoration projects. Understanding the specific colors and types of paint that were available during the era in question is the first step in this process. Researching historical documents, photographs, and artifacts can provide invaluable insights into the color palette that was used for detailing.
Different time periods favored various paint compositions, including oil-based paints, natural pigments, and even milk paints. For example, in the 18th century, oil-based paints became popular due to their durability and rich colors. Alternatively, many Victorian homes utilized more muted shades that reflected the natural world, requiring restorers to choose paints that replicate these historic formulations.
When aiming for historical accuracy, it’s crucial to focus on the right finish as well. Gloss levels varied significantly across periods, with some eras favoring flat or matte finishes, while others embraced high-gloss applications for certain detailing. Understanding these subtleties can drastically affect the final outcome of a restoration project.
In addition to color and finish, consider the application techniques used during the time. Techniques such as hand-brushing or stippling can simulate the look and feel of original finishes, enhancing the overall authenticity of the work. Recognizing the importance of the correct application method is vital to achieving the desired period-correct appearance.
By thoroughly researching the historical context and selecting the right type of paint, restorers can ensure that their projects reflect a true representation of the past, honoring the craftsmanship and aesthetic values of the time.
Preparing Surfaces for Authentic Paint Application
Achieving an authentic paint finish begins with meticulous detailing of the surfaces to ensure proper adhesion and longevity of the paint. The foundational step is to thoroughly clean the surface to remove any dirt, grease, or previous coatings that may interfere with the new application.
Start by employing a gentle detergent or a solvent specifically designed for automotive use, followed by rinsing with clean water. For surfaces that are particularly challenging, such as those with old paint or oxidation, a medium-grit sandpaper can be utilized to strip away imperfections, providing a smoother base for the new paint. Be cautious during this process to avoid creating deep scratches that might show through the final finish.
After sanding, it is essential to perform a detailed inspection of the surface. Look for rust, corrosion, or other damage that could compromise the integrity of the paint finish. Any rust should be treated with a rust-inhibiting primer after sanding it down to bare metal, ensuring a clean slate for optimal paint adhesion.
Next, proceed with a thorough wipe down using a tack cloth. This will remove dust and fine particles that could detract from the finish quality. Following this, masking tape should be applied meticulously around edges and areas not meant to be painted to ensure sharp lines and a clean overall appearance.
Finally, ensure that the surface temperature is appropriate for painting, as this can significantly affect the paint’s drying and curing process. With surfaces prepared to a high standard, the application of paint can then proceed, leading to a finish that is not only aesthetically authentic but also durable and lasting.
Techniques for Layering and Finishing to Match Historical Styles
Achieving a period-correct paint finish requires meticulous attention to detail and a deep understanding of historical techniques. One of the most effective methods is to employ layering, which involves applying multiple coats of paint to create depth and richness in color reminiscent of the original finishes.
The first step in layering is to select the appropriate type of paint. Historical periods often favored natural pigments mixed with linseed oil or other binders. Using these period-appropriate materials enhances authenticity. It’s crucial to prepare the surface adequately by cleaning, sanding, and priming. A smooth, properly-prepared surface allows for even application of paint layers.
After the base coat, subsequent layers can be applied using techniques such as glazing or scumbling. Glazing involves mixing a transparent color with a medium to create a translucent layer over the base coat, allowing the underlying color to show through. This technique was widely used in the 18th century to achieve depth in finishes. Scumbling, on the other hand, involves applying a lighter or contrasting color in a semi-transparent manner, which softens the overall tone and creates an aged look.
For the final finish, consider using wax or oil to seal and protect the paint. Historically, wax was a popular choice, as it provided a soft sheen and enhanced the appearance while being easy to maintain. Applying wax also allows for some level of touch-up, which was common in period practices.
Another important aspect is the aging process. Techniques such as distressing or patination can simulate wear and tear, vital in achieving an authentic period look. This can include lightly sanding edges or combining pigments to mimic the effects of time on the paint surface.
In summary, layering and finishing techniques that match historical styles require a combination of traditional materials and methods. Understanding the characteristics of period paint and applying techniques like glazing, scumbling, and proper sealing will help achieve a finish that is not only beautiful but also historically accurate.


