

For enthusiasts and collectors of classic 1970s JDM cars, preserving the original paint finish is essential for maintaining the vehicle’s authenticity and value. The rich colors and unique textures of these vintage vehicles require specific care to protect them from the elements while enhancing their natural beauty. Choosing the right wax is not just about shine; it plays a crucial role in safeguarding the paint from UV rays, oxidation, and environmental contaminants.
When selecting a wax for these classic treasures, it is vital to consider the formulation that aligns with your car’s original paint type. Many 1970s JDM models feature single-stage paints, which are more susceptible to fading and damage. Therefore, a high-quality wax can provide a protective barrier while offering nourishing properties to rejuvenate the finish. Additionally, the ease of application and longevity of the wax product should be taken into account to ensure prolonged care and maintenance.
In this article, we will explore the best waxes available for classic 1970s JDM car finishes, focusing on products that not only enhance shine but also provide the necessary protection to keep your cherished rides looking pristine. Our goal is to guide you through optimal options that respect the integrity of your classic vehicles while delivering unmatched results in care and restoration.
Choosing the Right Wax for Vintage Paint Types
When caring for classic 1970s JDM cars, selecting the appropriate wax is essential for preserving the unique finishes typical of that era. Vintage paints can vary significantly, and understanding these differences will help you maintain the integrity and appearance of your vehicle.
Consider the following factors when choosing wax for vintage paint types:
- Type of Paint: Determine whether the car has single-stage or two-stage paint. Single-stage paints often require more care due to their inherent lack of a clear coat, while two-stage paints offer greater protection but still need careful maintenance.
- Wax Composition: Natural waxes, such as carnauba, are often preferred for vintage finishes as they provide a warm, glossy look while being gentle on the paint. Synthetic waxes, while durable, may not be as suitable for older paints due to their harsher chemical formulations.
- pH Balance: Choose waxes that provide a pH-neutral formula. Acidic or alkaline products can break down older paint, leading to fading or damage over time.
To ensure optimal results, follow these steps when applying wax:
- Thorough Cleaning: Before applying any wax, carefully wash the vehicle to remove dirt and contaminants that can cause scratches.
- Paint Assessment: Inspect the paint for any oxidation or blemishes and consider using a polish to prepare the surface.
- Application Method: Use a soft applicator pad for a gentle application of wax. Apply in a thin, even layer to enhance the finish without overwhelming the paint.
- Curing Time: Allow the wax to cure as per the manufacturer’s recommendations, ensuring it bonds effectively to the paint surface.
- Final Buffing: Once cured, gently buff the surface to bring out the shine, using a soft microfiber cloth.
By selecting the right wax and applying it carefully, you can maintain the beauty and longevity of your vintage JDM car’s paint, ensuring it continues to turn heads for years to come.
Step-by-Step Application Tips for JDM Car Wax
Applying wax to your classic JDM car not only enhances the paint’s shine but also provides essential protection. Follow these detailed steps for optimal results.
Step 1: Clean the Surface
Before applying any wax, thoroughly wash the car to remove dirt, grime, and contaminants. Use a pH-balanced car shampoo and microfiber wash mitt to avoid scratching the paint. Rinse well and dry completely with a clean microfiber towel.
Step 2: Inspect the Paint
Examine the paint for any imperfections, swirls, or scratches. Consider using a clay bar to remove embedded contaminants that washing alone won’t eliminate. This step is crucial for achieving a smooth finish before waxing.
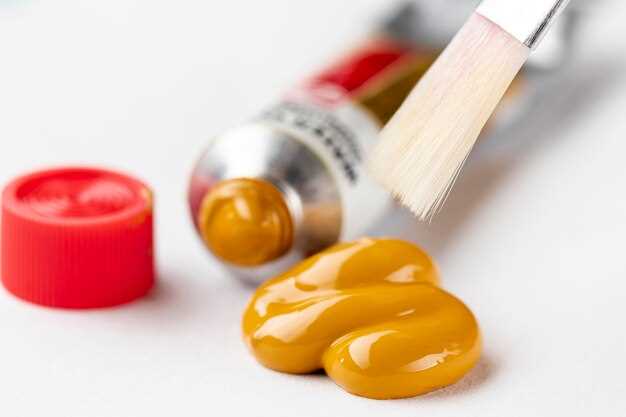
Step 3: Choose the Right Wax
Select a wax specifically formulated for classic car finishes. Look for products that contain natural carnauba or high-quality synthetic wax, as these provide a rich, deep shine and excellent durability. Always check the product compatibility with your vehicle’s paint type.
Step 4: Application Method
Using an applicator pad, apply a thin, even layer of wax to a small section of the car’s surface. Use circular motions to work the wax into the paint, ensuring full coverage. Avoid applying too much wax, as it can lead to a hazy finish.
Step 5: Allow Wax to Haze
Let the wax sit on the surface for the recommended time specified by the manufacturer, usually until it hazes. This allows the wax to bond effectively with the paint, providing better protection and shine.
Step 6: Buff the Surface
Once the wax has hazed, use a clean, dry microfiber towel to buff the surface. Gently remove any excess wax, revealing the polished finish beneath. Work in straight lines rather than circular patterns to avoid introducing swirls.
Step 7: Finishing Touches
After buffing the entire car, inspect the surface for any missed areas or uneven patches. Apply additional wax if necessary and repeat the buffing process. This step ensures an even and flawless finish.
Step 8: Regular Maintenance
To maintain the wax finish, consider performing regular wash and wax cycles. Use a pH-neutral car shampoo and avoid automatic car washes with brushes that can mar the paint. Regular care extends the life of the wax and keeps your JDM car looking pristine.
Maintaining a Long-Lasting Shine on Older Finishes
Classic 1970s JDM car finishes often require special care to preserve their original beauty and luster. Maintaining a long-lasting shine on older paint involves understanding the composition of the paint and how it interacts with environmental factors. Regular cleaning and protection are essential to ensure the longevity of your car’s finish.
The first step is to choose the right cleaning products. Opt for pH-balanced car shampoos that won’t strip away any existing wax or damage the paint. When washing, use soft microfiber towels to avoid scratching the finish. Rinse thoroughly to eliminate any soap residues that could dull the paint’s shine.
Once cleaned, applying a high-quality wax is crucial for protecting older paint. Waxes create a barrier against UV rays, dirt, and moisture, all of which can degrade the finish over time. Look for synthetic or natural waxes that offer long-lasting protection and enhance the depth of color. Additionally, consider products formulated specifically for older finishes, as they often contain nourishing oils that help rejuvenate the paint.
For maximum results, wax your vehicle regularly. Depending on the climate and exposure, every three to six months is a good rule of thumb. Before applying wax, ensure the surface is cool and free from contaminants that may prevent an even application. Use a gentle circular motion and apply thin layers for optimal coverage.
Furthermore, be mindful of where you park your vehicle. Exposure to the sun, bird droppings, or tree sap can lead to premature aging of the paint. Whenever possible, use a car cover or park in shaded areas to minimize these risks. Additionally, consider frequent inspections of the paint for scratches or imperfections; timely touch-ups can significantly prolong the life of the finish.
In summary, maintaining a long-lasting shine on older finishes requires careful washing, regular waxing, and attention to the environment. By adopting these practices, you can ensure your classic JDM car retains its stunning appearance for years to come.


